
Cannoli Cheesecake Bars, easy Italian cheesecake recipe with ricotta, mascarpone, orange, and chocolate chips. The perfect tasty cheesecake for the holidays, potlucks, or even National Cheesecake Day.

You know I’m a bit obsessed with my cannoli recipes, so here are some delicious Cannoli Cheesecake Bars to add to my other favorite cannoli recipes. My Cannoli Cookies, Cannoli Cake, Best Cannoli Dip, and Cannoli Cream Chocolate Truffles have all been super popular. These Cannoli Cheesecake Bars are full of tasty mascarpone cheese, ricotta cheese, chocolate chips, and fresh orange zest. A must try for sure!

My family loves everything and anything cannoli as you probably have already guessed. A few months ago, I was in the mood for a good Cannoli Cheesecake but didn’t want to make a big cheesecake. I thought instead, I’d do a little experimenting and make these thinner cheesecake bars.
These bars aren’t like cookie bars and don’t taste like cookies. They are also thinner than a typical cheesecake made in a springform pan. So kind of the best of both worlds.
You can easily change these cheesecake bars up a bit, but more on that later. You can also cut them into any size or shape you want. Perfect for parties, potlucks, holidays, and National Cheesecake Day (July 30th).
How to Make Cannoli Cheesecake Bars
First, of course, preheat your oven.
Next, you’ll need to make the crust for the Cannoli Cheesecake Bars. I thought about using cannoli shells. However, they can be expensive, hard to find, and super time consuming to make. Instead, I decided on using waffle cones right from our local grocery store.
You could try substituting cannoli shells or graham cracker crumbs if you don’t want waffle cones for whatever reason. I bet regular sugar cones would work fine as well. I have only tried this recipe with waffle cone crumbs so can’t say for sure how the crust will work with substitutions. Or use your favorite cheesecake crust recipe instead.
You’re going to need waffle cone CRUMBS for the cheesecake crust. I like to use a food processor. Place the waffle cones in a food processor and process until fine crumbs. Another option is to place the cones in a large sealable bag and use a meat mallet or rolling pin to make crumbs.
You’ll probably need about 8-10 waffle cones to get the 1 1/2 cups of crumbs needed for the recipe. Since cones can be different sizes, I’d start with just a few cones and go from there. Add more cones to your food processor or bag as needed.
Once you have your cone crumbs, add the crumbs and melted butter to a bowl and stir to combine.
Next, prep your pan. I lined my 9×9-inch baking pan with parchment paper but you don’t have to. You could also try well greased or nonstick aluminum foil. Lining the pan will make it easier to lift the whole cheesecake out and cut it into bars.
Pour the cone crumbs into the pan and press down to form a nice even layer covering the whole bottom of the pan.

Once your crust is done, set it aside. You don’t have to prebake the crust but if you tend to like to prebake your cheesecake crusts, by all means, bake it for a few minutes.
Next, make the Cannoli Cheesecake filling by beating together the ricotta cheese, mascarpone cheese, and sugar with an electric mixer on medium speed until well combined and not lumpy.
I suggest using full-fat ricotta and mascarpone cheese and bring them to room temperature before making the filling so that the filling isn’t lumpy. The cheeses I get are generally thick and do not need to be strained BUT if yours are not thick (like cream cheese) strain them overnight. (see how to strain ricotta cheese for info on how to do that)
Beat in the eggs to the cheese mixture one at a time, then beat in the vanilla, cinnamon, and orange zest. Spread the filling over the crust. Sprinkle the chocolate chips on top of the batter.
You could also add some chopped nuts in addition to the chocolate chips, or instead of, or use a combination of both nuts and chocolate.

Bake the cheesecake for about 30-45 minutes although I suggest checking on it after about 25 minutes just to be on the safe side. You’ll know the cheese is done when it’s golden brown around the edges and the center is nearly set and not overly “jiggly”. A little “jiggly” is ok.
This cheesecake is fairly thin so it should bake up rather quickly compared to a regular cheesecake. My cheesecake bars usually take about 30-35 minutes but readers have said theirs have taken a little longer so I have adjusted the time. However, please note that a different size or shape pan can affect the baking time more or less.
Remove the cheesecake from the oven and let it cool, then refrigerate for at least 4-6 hours but if you can, refrigerate the cheesecake overnight.

I actually then placed my cheesecake in the freezer for a while then removed it from the pan. When frozen, it was easier to remove the cheesecake from the pan, remove the parchment paper, and easier to cut into nice even bars.
You don’t have to freeze the cheesecake though. It will still be delicious! It’s great cold from the fridge or frozen from the freezer. We ate it both ways…

We dusted the top of the Cannoli Cheesecake Bars with a little powdered sugar. A little drizzle of chocolate sauce on the plate or over the cheesecake would be great as well.
I cut the Cannoli Cheesecake into 8 large narrow bars to be similar to “slices” of cheesecake. You can definitely cut the cheesecake into smaller bars or even mini bite-size pieces.
These bars would be perfect for a party cut into mini bites. Serve with some of your favorite Italian appetizers like my Easy Chicken Parmesan Sausage Bites and Italian Beer Bread, and some fun drinks like a Cranberry Limoncello Spritzer or this Italian Cream Soda.

How Long is Cheesecake Good For?
Be sure to store these Cannoli Cheesecake Bars in the refrigerator (or freezer). You can serve the cheesecake at room temperature, cold from the refrigerator, or frozen from the freezer, but be sure to store in the refrigerator (or freezer) and not on your counter. If stored in the refrigerator and covered (and not near smelly foods), I would guess this cheesecake would be good for at least 5-7 days.
Can You Freeze Cheesecake?
YES you can freeze these Cannoli Cheesecake Bars! I actually have some of these bars in the freezer at the moment that have been there for a few months two (long story, don’t ask…). I would guess if stored well covered or wrapped, the cheesecake bars would last at least 3-6 months.
These Cannoli Cheesecake Bars are a great make ahead dessert.

Can You Make These Cannoli Cheesecake Bars Low Carb or Gluten-Free?
Ok, so these are tough to make super low carb but there are a few things you can do if you’re concerned about carbs. First, use a nut flour or finely chopped nuts instead of the ice cream cones. Or substitute your favorite nut or low carb crust. Second, you can use a sugar alternative instead of the granulated sugar. Lastly, you can cut back on the mini chocolate chips or use a combo of nuts and chocolate chips to cut down on the carbs.
For a Gluten-Free option, you’ll just need to swap out the cones in the crust for a gluten-free crust. You can try a nut crust or try gluten-free cookie crumbs. Check the other ingredients, but they should be gluten-free.
Hope you enjoy this perfect tasty Cannoli Cheesecake recipe! Let me know what you think in the comments! Don’t forget to save this recipe for National Cheesecake Day July 30th. Check out my Easy Potluck Desserts for more fun recipes or other cannoli cheesecake recipes!

Cannoli Cheesecake Bars
Ingredients
- 1 1/2 cups waffle cone crumbs (about 10-12 cones) (or graham cracker crumbs)
- 5 Tablespoons butter melted
- 8 ounces ricotta cheese room temperature (full fat preferably & strained overnight if needed, see notes)
- 8 ounces mascarpone cheese room temperature (full fat preferably & strained overnight if needed, see notes)
- 1/2 cup granulated sugar
- 2 large eggs
- 1 teaspoon vanilla extract
- 1/2 teaspoon fresh orange zest
- 1/4 teaspoon ground cinnamon
- 3/4 cup mini chocolate chips
- Optional: powdered sugar
Instructions
- Preheat oven to 350 degrees F. Line the bottom and two sides of 9×9-inch square baking pan with parchment paper if desired.
- In a medium mixing bowl, mix together the cone crumbs and butter. Press mixture into bottom of the prepared baking pan to form a thin even crust.
- In a large mixing bowl beat together ricotta, mascarpone, and granulated sugar until well combined with an electric mixer on medium speed. Beat in eggs one at a time. Then beat in vanilla, orange, and cinnamon.
- Pour cheesecake filling on top of crust and spread to form an even layer. Sprinkle chocolate chips on top of cheesecake filling.
- Bake cheesecake at 350 degrees F for about 30-45 minutes or until slightly golden brown around edges and nearly set in center. (This cheesecake should bake in about 30-35 minutes but I have updated time based on reader results. Pan size or recipe changes will also affect baking time.)
- Remove from oven, cool then refrigerate for about 4-6 hours or overnight. You can also freeze for easier slicing.
- Slice cheesecake into 8 large bars (or any shape/size) and sprinkle with powdered sugar if desired. Store cheesecake bars in freezer or refrigerator.
Notes
Nutrition:
(Nutrition data is provided when available for informational purposes only and calculated using an online nutritional calculator. For the most accurate information please calculate based on specific ingredients and brands you use as well as any changes you made to the recipe. I am not a certified nutritionist or registered dietician and any nutritional information provided should only be used as a general guideline and estimate.)


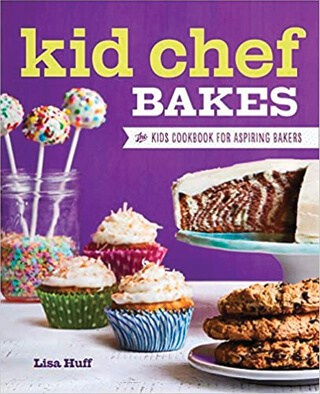
About Lisa Huff
Lisa Huff is a Cookbook Author, Freelance Recipe Developer, Food Photographer, Blogger/Writer, and award-winning home chef. She loves creating unique recipes from healthy to decadent including cocktails, appetizers, main dishes, dessert recipes and more and has appeared on various shows, publications, and websites.


These came out really great! I used an 8×11 glass pan because that’s the closest size I had. Did not drain my cheeses overnight, but did make sure they were room temperature. Made the crust gluten free by using Simple Mills “Sweet Thins” crushed in my food processor. The sweet thins were lemon flavored, so swapped out lemon peel for the orange peel. Refrigerated overnight and they cut up easily. Really tasty and very easy, will definitely make again. Thanks for the recipe!
Thank you so much! Sounds delicious with the lemon! :)
I read the reviews after I had made the bars and I got nervous, but there was no reason to be! I thought they turned out well. Not sure if others were expecting a traditional cheesecake flavor, but that is not what I would expect from a recipe with “cannoli” in the name. Thanks for the recipe! It was a nice addition to our Christmas dessert table.
Thank you!
These were good, but the cinnamon was a bit overpowering, for me. I would cut back on that, next time.
Made these bars last night! I doubled the recipe in a 9×13 ceramic pan. Baking time until middle was almost set was about 60minutes. My bars are thicker than this recipes so they needed more time to bake. I just kept periodically checking the oven and it was fine. The edges and top were slightly brown. The graham crust did stick to the pan on a few bars. This did not bother me as they tasted great! Cut them into tiny squares for a gathering. I followed the recipe exactly and did omit the orange zest as I did not have it. Will definitely make these again.
Thanks! Happy to hear you liked them! :)
So glad I tested this recipe before I took it to my family holiday party. Yuck! My family loves cannoli and all types of cannoli desserts. This totally missed the mark. It wasn’t sweet enough, the crust was wet and oily, and the texture of the filling was very off-putting. Don’t waste your money on the ingredients for this recipe. A big fat NO.
Hmmm sounds like something went wrong. Did you strain the ricotta for a day or two until it was the consistency of cream cheese? Sounds like the filling separated. Sorry it didn’t work out. When it does work out, it’s amazing!
I was so excited for these but they were not very good they didn’t have the right flavor.The waffle cone part was good but that’s it. My husband spit his out and my daughter that loves cannolis and cheesecake didn’t like them either. I was really sad.
Sorry you didn’t like them. If you want to message me I can try to help determine what went wrong for you.
Total waste is $25. Crust just crumbles apart. Messy to even serve and the filling has no flavor. Off to make another dessert. Bummed
Sorry it didn’t work out for you. The crust definitely should not be crumbly. Could make it into mini trifles if it fell apart for you.
Filling was really good but crust needs help. I was expecting crust to be crunchy but it was quite chewy like when a cannoli is left out for too long and the shell is going stale. Unimpressed for sure.
Hi there! I’m unable to print out the recipe card. Every time I try to click print (either from my phone or my computer), it takes me back to the top of the page with no luck. Just wanted you to be aware. This looks amazing and I can’t wait to try it!
Lisa,
Could one use pizzelle cookies for crust?
I haven’t tried but would think it would be ok.
If doubling the recipe, I assume a 9×9 pan (suggested for the standard recipe size) won’t work. Would you recommend a 9×13 style pan instead to accommodate for the doubling of ingredients?
I would suggest 2 pans if you can. You can try a 9×13 pan but they will be quite a bit thicker so might have to bake longer and make sure middle of pan cooks through. You could try a jelly roll pan as well (10×15). Good luck!
Made them tonight for Christmas dinner dessert. Very rich. Thought they would be firmer.
They should be firm like cheesecake. Might be the ricotta. Unfortunately, different brands can have a very different consistency.
I’m planning to make this for Easter , I just can’t find what temperature to bake at ! If you can let me know please and thank you :)
Hi, if you click on “jump to recipe” it should take you right to the recipe. It’s in step 1, 350 degrees F.
I had high hopes for this recipe, but it did not pan out for me as expected. I thought that the crust was a bit dry, but that could be because I pre-cooked it for 5 minutes. I also overcooked it trying to balance the jiggliness of the center with the browning on top. I found the filling to be bland vs what I thought would be somewhat decadent. Maybe I will try cream cheese instead of ricotta next time cause I really like the concept.
Sorry it didn’t work out for you. Unfortunately, ricotta can be a little tricky to bake with and needs to be really thick and drained well before baking. Cream cheese is a good substitute.