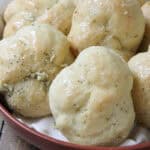
These from-scratch Garlic Knots are soft, fluffy, and brushed with buttery garlic seasoning, then finished with savory Parmesan cheese. Made with homemade pizza dough and baked until golden, this easy garlic knot recipe is perfect as an appetizer, side dish, or snack with marinara for dipping.

Garlic Knots are one of those irresistible, crowd-pleasing breads that disappear the second they hit the table. They’re light and fluffy on the inside, golden on the outside, and coated in a tasty buttery garlic flavor that soaks into every knot.

Because they start with pizza dough, these garlic knots are surprisingly simple to make at home. They’re perfect alongside pasta and meatballs, lasagna, pizza night, soups, or as a standalone appetizer. Warm, cheesy, and full of flavor, they’re always a hit.
You’ve probably had something similar at your favorite pizzeria or restaurant like Pizza Hut, Domino’s, Papa John’s, etc. but now you can make them at home anytime you want!
What I Love About This Recipe
- I love how easy they are to customize. You can switch up the herbs, cheese, or even add a little spicy heat. Once you have the base down, it’s easy to make them your own. That’s what makes this recipe a keeper.
- I also love how soft and fluffy these garlic knots turn out. Using homemade pizza dough gives them that perfect chewy bread texture without any complicated steps. They bake up light and tender every time. Warm bread like this is impossible to resist.
- The classic garlic butter topping is simple but packed with flavor. Fresh garlic, melted butter, and Italian seasoning soak right into the knots. Then the Parmesan adds a salty, savory finish that takes them over the top.
- These knots are incredibly versatile. They work as an appetizer, a side dish, or even a snack on their own. Serve them with marinara, soup, or pasta.
Equipment You May Need
- Baking Sheet – Provides space for the knots to bake evenly.
- Parchment Paper – Optional, but helps prevent sticking and makes cleanup easier.
- Small Bowl – Used for mixing the garlic butter topping.
- Pastry Brush – Makes brushing the butter evenly onto the knots easy.
(Full printable recipe card is at bottom of post.)
Garlic Knots Ingredients
- Prepared Pizza Dough – Forms the base of the knots and keeps them soft and chewy.
- Fresh Garlic – Adds bold, classic garlic flavor.
- Unsalted Butter – Creates a rich, flavorful coating.
- Salt – Enhances the garlic and butter.
- Italian Seasoning – Adds herb flavor without overpowering the knots.
- Parmesan Cheese – Finishes the knots with savory, salty goodness.
How to Make Garlic Knots
Step One: Prepare Dough and Preheat Oven
Prepare homemade dough (directions below) or use your favorite premade pizza dough. Preheat the oven to 350°F. Lightly grease a baking sheet or line it with parchment paper. Set aside.
Step Two: Shape the Knots
Divide the prepared pizza dough into 12 equal pieces. Roll each piece into a rope about 8 to 12 inches long. Tie each rope into a knot and tuck the ends underneath. Place the knots on the prepared baking sheet. Lightly cover with plastic wrap and let rise in a warm, draft-free place for 30 minutes to 1 hour, until puffy.
Step Three: Bake the Knots
Bake the knots for 13 to 17 minutes, or until very lightly golden brown.
Step Four: Add the Garlic Parmesan Topping
While the knots bake, mix together the minced garlic, melted butter, salt, and Italian seasoning in a small bowl. Remove the knots from the oven and brush generously with the garlic butter mixture. Sprinkle Parmesan cheese over the tops, then return to the oven for 3 to 5 minutes, or until golden brown.
(Full printable recipe card with full details is at bottom of post.)

Serving Suggestions
- Serve warm with your favorite quick dip for dipping, like marinara sauce, buttermilk ranch dressing, Caesar dressing, Alfredo sauce, buffalo sauce, or extra garlic butter.
- Pair with pasta dishes or pizza night.
- Add to appetizer spreads or game day menus.
Quick Tips for Best Results
- Let the knots rise until puffy for the softest texture.
- Brush generously with garlic butter for maximum flavor.
- Serve warm for the best taste and texture.
- Do not overbake so that they do not dry out.

Garlic Knots FAQ
How should I store Garlic Knots?
Store leftovers in an airtight container in the refrigerator for up to 3 days. Reheat before serving.
Can I freeze Garlic Knots?
Yes, baked garlic knots freeze well. Freeze without the topping if possible, then reheat and brush with butter after warming.
How long will Garlic Knots last?
They are best the day they’re made, but will keep for up to 3 days refrigerated.
Substitutions?
You can use different dried herbs or swap Parmesan for another hard cheese.
Can I use low-fat ingredients?
Low-fat substitutions may reduce flavor. Full-fat butter and cheese give the best results.
What else can I add to this recipe?
Try adding red pepper flakes, fresh parsley, or roasted garlic to the butter mixture. You can make a stuffed Garlic Knots with pepperoni and mozzarella cheese.
Can I make this vegan/vegetarian/low carb/gluten-free?
Here are some suggestions, but I can’t guarantee results. Be sure as always to check particular brands and ingredients if you’re following a specific diet or have diet restrictions or allergies.
Vegan – Use plant-based pizza dough, butter, and dairy-free cheese.
Vegetarian – It’s vegetarian. Be sure to check individual brands/products just to be sure though.
Low-Carb – This recipe is not low carb and would be difficult to make low carb. You could try a low-carb dough alternative.
Gluten-Free -Use a gluten-free pizza dough, but the texture may vary.

Other Bread Recipes You May Enjoy
- White Sandwich Bread – Soft, fluffy bread from scratch!
- Cast Iron Biscuits – Easy homemade biscuits made in a cast iron pan.
- Cornbread Muffins – Soft, sweet cornbread that goes great with any meal.

Hope you enjoy this delicious Garlic Knots recipe. Tell me in the comments if you had any other spices.
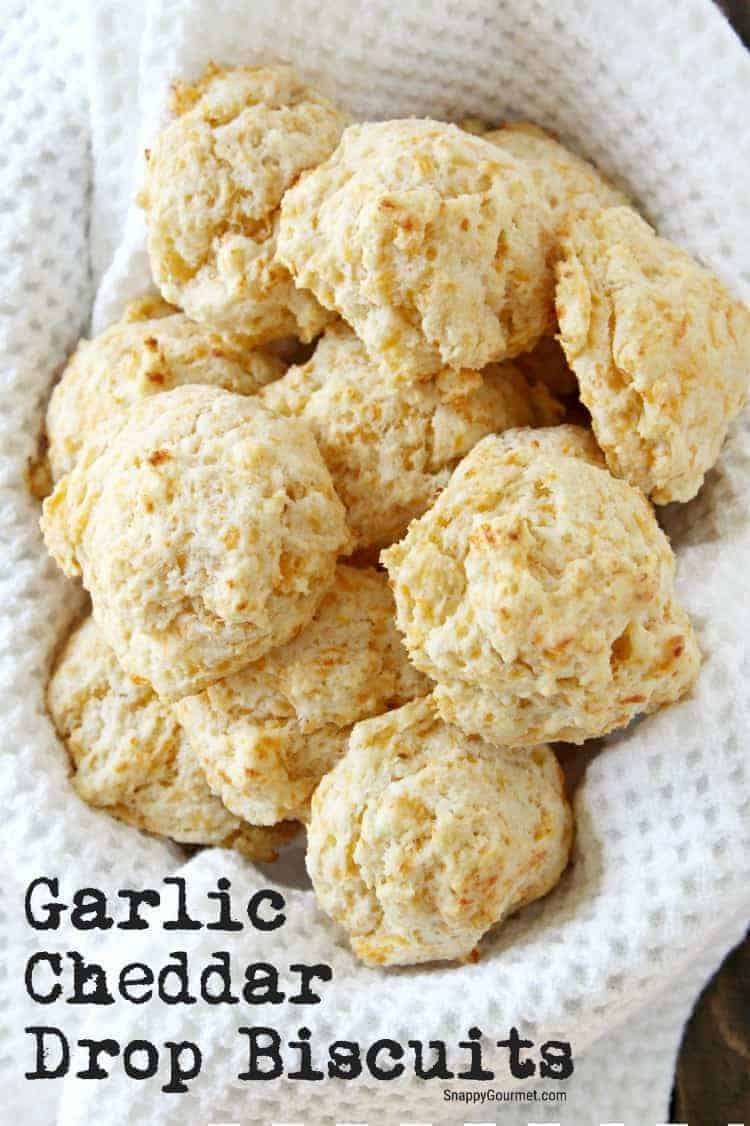
If you like garlic, you may also like these easy from-scratch Garlic Cheddar Drop Biscuits.
Garlic Knots
Ingredients
Dough:
- 2 3/4 to 3 1/4 cups all-purpose flour
- 1 (3/4 oz envelope) active dry yeast
- 1 teaspoon granulated sugar
- 1 teaspoon salt
- 1 cup warm water (105 to 1115 degrees F)
- 3 Tablespoons olive oil divided
Topping:
- Butter for greasing the pan (optional)
- 3 to 5 small fresh garlic cloves peeled and minced
- 4 tablespoons unsalted butter melted
- ½ teaspoon salt
- ½ teaspoon Italian seasoning
- ¼ cup Parmesan cheese
Instructions
For the Dough:
- In a large bowl, add 2 3/4 cups flour, yeast, sugar, and salt.
- Add the water and 2 Tablespoons of oil to the bowl. Beat until the dough forms a soft ball. Mix in additional flour as needed.
- Place the dough on a lightly floured surface and knead until the dough is smooth and elastic, about 6-8 minutes.
- Grease a large bowl with the remaining Tablespoon of olive oil, add the dough, turn to coat, cover with plastic wrap and place in a warm, draft-free place until double in size, about 1 hour.
For the Knots:
- Divide the pizza dough into 12 pieces. Roll each piece into a long rope 8 to 12 inches long. Tie each rope into a knot, then tuck the ends underneath the knot. Place the knots on the prepared baking sheet. Lightly cover the knots with plastic wrap and place in a warm, dark, draft-free place for a half hour to an hour, or until risen again.
- Preheat the oven to 350˚F. Lightly grease a baking sheet or line with parchment paper.
- Bake the knots for 13 to 17 minutes, or until very light golden brown.
- Meanwhile, in a small bowl, mix together the garlic, melted butter, salt, and Italian seasoning. Brush over the knots, then sprinkle the cheese on top. Bake an additional 3 to 5 minutes, or until the knots are golden brown.
Notes
- Serve with your favorite marinara sauce.
- Instead of Italian seasoning and Parmesan cheese, substitute your favorite dried herb and cheese.
Nutrition:
(Nutrition data is provided when available for informational purposes only and calculated using an online nutritional calculator. For the most accurate information please calculate based on specific ingredients and brands you use as well as any changes you made to the recipe. I am not a certified nutritionist or registered dietician and any nutritional information provided should only be used as a general guideline and estimate.)


About Lisa Huff
Lisa Huff is a Cookbook Author, Freelance Recipe Developer, Food Photographer, Blogger/Writer, and award-winning home chef. She loves creating unique recipes from healthy to decadent including cocktails, appetizers, main dishes, dessert recipes and more and has appeared on various shows, publications, and websites.